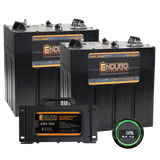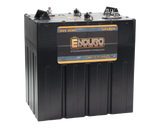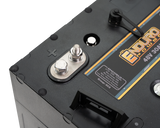
Why switch from your old lead acid battery to Lithium? Enduro Power lithium golf car battery kits are the only true "Drop-In-Ready" lithium batteries for golf carts utilizing an industry standard Group GC2 case size. Eagle 48V 60Ah Battery Kits make it so that the conversion from lead acid to lithium couldn't be easier.
Choose from 2 x 48V 30Ah (60Ah Kit) all the way up to 4 x 48V 30Ah (120Ah kit) lithium golf cart battery kits for maximum range and performance. Our lithium golf cart conversion kits are compatiable with all major brands including Club Car, EZGO, ICON, Yamaha, AdvancedEv and Icon and more.
Simply remove your existing lead-acid batteries and replace with the Allied lithium golf cart batteries, attach cables in parallel, secure holding bracket, and the install is complete. With the Eagle 48V 60Ah Battery Kit you will benefit from less than half the weight, extended run time, 3500+ life cycles, zero maintenance and our industry leading 10-year warranty!
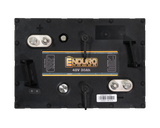
Note: There are On/Off buttons on top of each battery. Leave these off until installation is complete. No power is reaching the terminals until turned on in Step #6.
1. Physically Install Batteries - Place the batteries into the cart either in the middle position or the best position so that your battery brackets are able to hold the batteries in place. You do want the batteries relatively close to each other (ie: for cable length). If your cart needs another battery case in place for the battery bracket to function properly we do sell empty cases to fulfill that need.
2. Parallel Connection - Take two of your existing battery cables and PARALLEL connect your batteries. This is POSITIVE to POSITIVE and NEGATIVE to NEGATIVE. We do sell battery cable kits if you are missing cables or would like to install new cables with your battery bank.
3. Connect Charger, Load Cables from Cart & Power Leads from Fuel Gauge (ie: Motor) - Find a good place to mount the charger into the frame of the cart where some of the old batteries were. Then take the positive wires from the cart, charger and fuel gauge and wire them to Battery #1 Positive. Then take the negative wires from the cart, charger and fuel gauge and wire them to Battery #2 Negative.
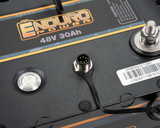
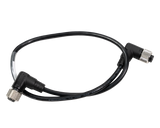
4. Battery Communication Cables - Install communication cables between the batteries. Either open port on the battery is fine.
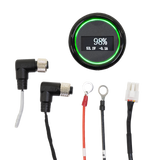
5. Install Fuel Gauge Communication Cables - Install the communication cable from the Fuel Gauge to the battery bank. Then on the last battery with the remaining available communication port open install the terminator plug (stubby terminator) on the remaining open port.
6. Turn On Batteries - Depress the On/Off buttons on top of both batteries to activate power to the terminals. The cart is now powered. The Fuel Gauge will indicate the status of the battery bank. It is recommended to provide a full charge to the battery bank prior to first test drive. This will take about 3-4hrs for a 60Ah kit (4-5hrs 90Ah Kit, 5-6hrs 120Ah kit).
7. Mounting Fuel Gauge - You can choose to mount the Fuel Gauge to the dash of your cart if so desired with the template provided.
If you have any additional questions about the Eagle 48V 60Ah Battery Kit just let us know. We are here to help out!
Eagle 48V 60Ah Kit